

Fe Contract Basics and Deployment

(Disclaimer: I am in no way an expert at this. I am a noob. Apologies for any mistakes.)
Continued from Installing Fe.
Once you have downloaded the Fe compiler, it’s time to make a Fe contract.
Most of this tutorial comes from the official Fe Guide. So check it out!
Creating Fe Contract
Steps:
First, run $
export PATH="/$HOME:$PATH"to make Fe compiler available anywhere in your directories (this only applies to a single session, once you exit you need to run this again)
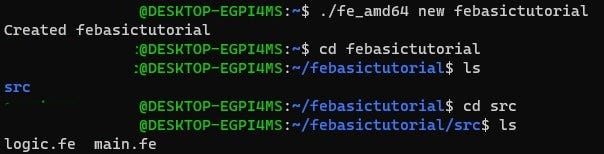
Then run $
fe_amd64 new febasictutorialto make a directory using the Fe compiler. Run $cd febasictutorialthen $cd src, if you run $lsyou can see default Fe files in the folder but for our tutorial, you can ignore this for the moment. (Note: fe_adm64 can be fe or fe_mac depending on what you installed)
Next is to open your IDE , mine is VSC. Run $
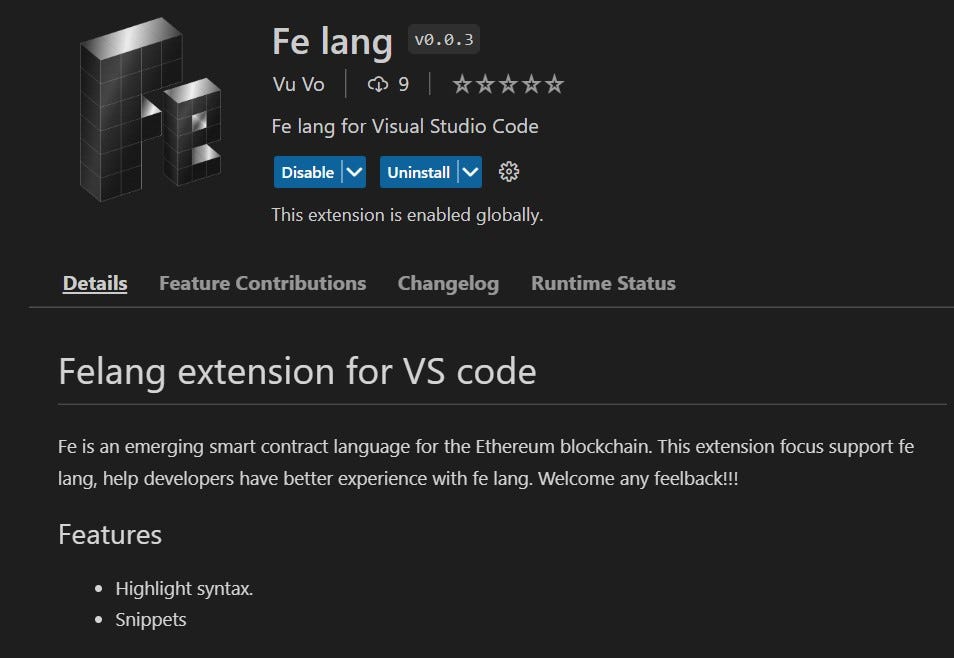
code .to open VSC , create a fileguest_book.fe. You can install Fe lang extension by Vu Vo to have syntax highlights and file icons for Fe.
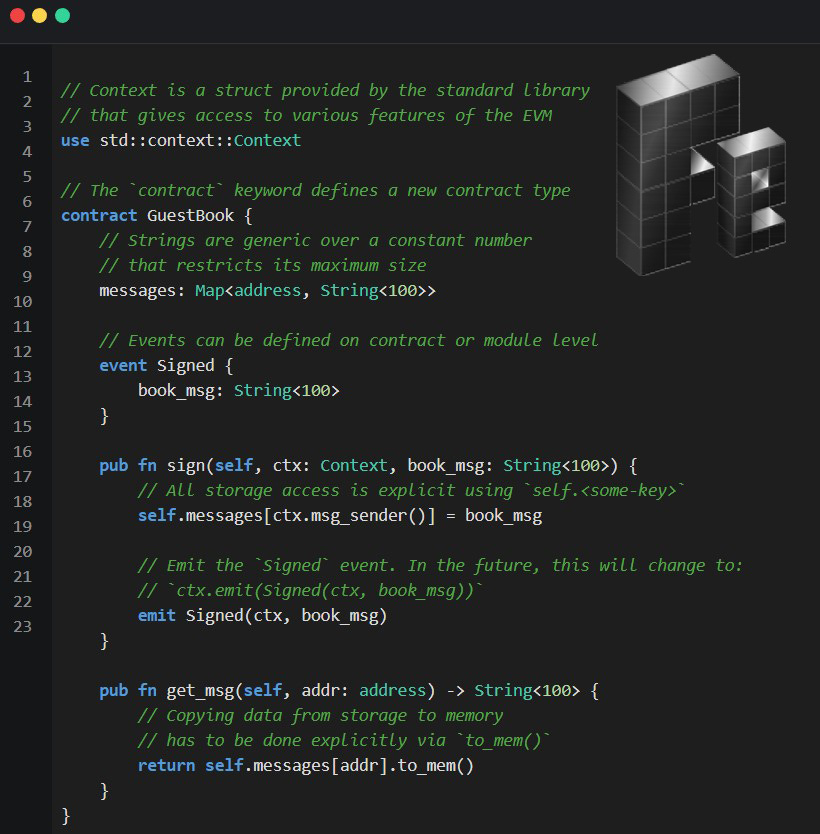
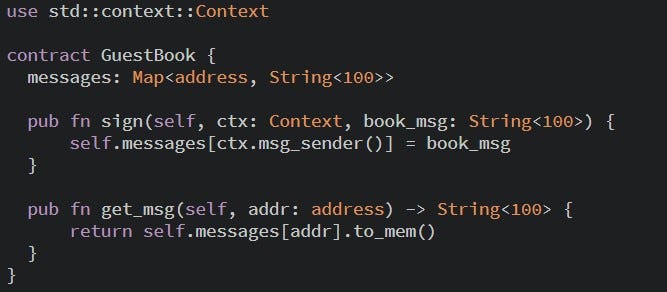
Write your first contract as follows:

messages is a map type to associate (Key, Value) in this case the address type as the key (ETH address) and String<100> (string characters with 100 character limit) as the value.
CRLF to LF to avoid unexpected errors when executing the compiler

Run $
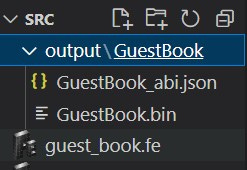
fe_amd64 build guest_book.fe, it will compile if there is no error. Then check the output folder which will contain some files:
:

Next is to add some functionality and use the Context crate from the standard library then
run $ fe_amd64 build guest_book.fe --overwritecommand to have new output
pub syntax makes a function public as it is private by default. Context type parameter is used to access chain and transaction state. ( I haven’t understood much here, you have to figure it out yourself.)


Deploying the Contract
Before we get to the next steps, you have to do the following first:
Download dapp.tools ( You have to install the right Nix based on your OS)
Alchemy tutorial (use goerli testnet) to get an API URL you will need this later
Metamask private key tutorial (Use a throw-away wallet)
List of faucets (You need to get some ETH for gas usage)
Steps
Run $
ethsign import -key-store ~/.ethereum/keystore/Then enter your private key and enter your passphrase (like a password)
Run $
ETH_RPC_URL=<rpc-url> ETH_GAS=8000000 ETH_FROM=<our-eth-address> seth send --create output/GuestBook/GuestBook.binto deploy the contract to the testnet:
Command Format 
Actual command The <rpc-url> is your API key from Alchemy. <ETH-FROM> is your public ETH address.
It will look like this if the deployment is successful

To sign a message, Run $
ETH_RPC_URL=<rpc-url> ETH_GAS=8000000 ETH_FROM=<our-eth-address> seth send <contract-address> "sign(string)" '"We <3 Fe"'
To read the message within the blockchain, run $
ETH_RPC_URL=<rpc-url> seth call <contract-address> "get_msg(address)" <address-to-check> | seth --to-ascii
You should see your previous message.


Congratulations, you were able to successfully make your first Fe contract and deploy it to the Eth blockchain testnet!